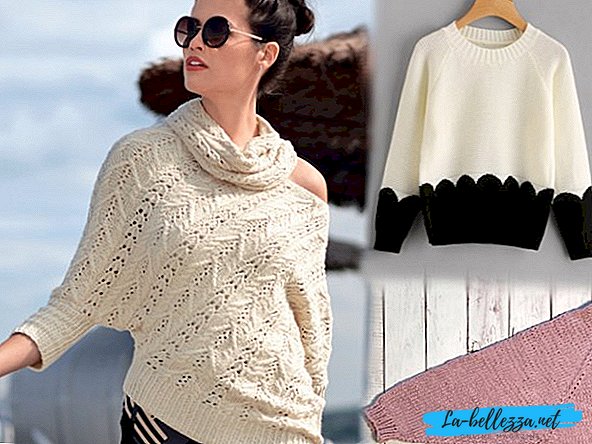
To learn how to knit the product with quality and speed, you should familiarize yourself with several important aspects of knitting, which are sure to be useful for both beginning needlewomen and professional knitters. In this case, we will discuss the sleeves - an important element of the huge number of models of clothing for women, men, boys and girls, which every craftswoman faces knitting.
The creation of knitted sweaters, cardigans, pullovers, sweaters, jumpers, jackets, dresses, tunics, boleros and coats can not be done without knitting sleeves. Therefore, it is important to understand the varieties of this important part of the products, and the specifics of their knitting with needles. Of course, the sleeves can be crocheted, but in this article we will pay special attention to knitting the sleeves. Let's take a closer look at how to knit a sleeve with needles from the bottom, and how to knit a sleeve from top to bottom with needles, depending on the chosen style.
How to knit sleeves with knitting needles - scheme and description for beginners

Forms of sleeves, as well as their knitting techniques, there is a huge variety. Before you knit the product, it is necessary to determine the exact pattern of the sleeves. The finished look of the sleeve is influenced by two factors: the chosen form of this part of the thing and the intended style of the finished product as a whole. Here is main types of tailoringthat are used to create various knitted clothes:
- Vtachnoy sleeve;
- Raglan;
- Bat;
- Sleeve without line okat;
- Sleeve with epaulet;
- Sleeve with shallow arm;
- Torch;
- Sleeve kimono.
And although the structure of the sleeves is slightly different, the specificity of their knitting is still different.
Beginner knitters from the general rules of knitting sleeves should note the following:
- First, the armhole of the sleeves is knitted, then it is already rolled over;
- The shoulder line, depending on the model of clothing, knits: straight, with a slope, as well as with rounding.
It is this feature that distinguishes many types of sleeves, and it is possible thanks to the work with the reduction of loops. Calculating Loops for Diminution on the back and shelfbeginners should consider the following:
- Considering the total number of loops, you need to take away those that will go on the shoulders and roll the neck;
- The remaining number of loops is divided by two - this is the number and should be reduced to knit the armhole;
- From the beginning of the very first row, you need to close three or four loops, and then through the row - twice one at a time. After that, it closes one loop until the number you need in your case is on the knitting needles.
For the armhole of the sleeve, the actions from point 3 are performed, after which the rounding of the upper part of the sleeve is knitted in this way: one or two loops are reduced until several loops remain. When the armhole is formed, the hinges both lower and close. Close them at the beginning of the row. Modeling armhole loops are reduced either inside the row or along the edges. Thus it turns out a thin side with a slope in the right direction.
Consider knitting techniques for the most popular knitter types among knitter beginners in more detail.
Knit vtachnogo sleeves

Knitting the set-in sleeves with knitting needles is directly related to the calculation of the order of loop hinge reduction when knitting the neck of the sleeve and the armhole of the main canvases. The most accurate way to determine the number of loops is to tie a sample of the main pattern and measure the density of the loops, then transfer the pattern to millimeter paper and make calculations.
Often vtachnoy sleeve knits below. As soon as the gum is tied to the desired height, the addition of loops begins. To do this, subtract the amount of loops of the dial-up row from the number of loops of the beginning of the lambing of the sleeve. And for accurate determination of the periodicity of the loop gains, consider, based on the density, the number of knotted rows. After that, the additional loops are evenly distributed. On the armhole, the reductions are made at the beginning of the row.
After all the reductions have been completed and the necessary number of rows has been knitted, an okat will knit. As a rule, three loops are removed from each edge three times. In the last row, all remaining loops are closed.
How to tie a raglan

One of the most popular types of knitting of the sleeves with knitting needles is raglan, so beginning knitters will often face its features in patterns. It should be immediately noted that knitting raglan sleeves can be made both from above and below.
If you knit raglan knit bottom, then the same method is used as when knitting a set-in sleeve. After completing the required length, begin the process of lowering the loops. Often the loops are lowered as follows: through each row one of the two loops is knitted, before and after the hem.
Knit raglan top has its advantages, for example, in the process of work at any time, you can try on the sleeve and correct errors. Work better on circular needles. The model of clothes with a clasp on the raglan also allows the use of straight knitting needles. Important: if the product has a collar, then the raglan top knitting begins with it, and if the collar is not provided for according to the plan, then the raglan gains are made from the very beginning.
How to knit raglan in this way: calculate the number of loops for the neck according to the finished sample. The number of loops dialed is divided into four - these loops will be the raglan line. The loops of raglan lines are best marked with markers or contrasting threads. If the product includes a raglan with a fastener, and the sleeve is knitted on straight needles, one of its parts is once again divided in half - this will be the place for the fastener.

When knitting raglan circular knitting needles, one should add loops in every odd row.
Knitting on straight knitting needles involves the addition of loops in the front rows and knitting on the pattern in the purl.
In order to clearly distinguish the raglan line on the product, it is necessary to knit the marked loops only with facial ones, and additions should be done before and after them.
The very same adding loops You can crochet, or knit from one loop two. In the first case, the result will be a pattern with holes, and in the second - a smooth canvas.
The chosen method of knitting is observed up to the level of the armpits, after which the loop of the sleeve is removed for additional knitting needles, or for pins.
Rules knitting sleeves "Bat"

Knitting the Bat sleeves is also quite popular, so novice knitters should also familiarize themselves with its common features. Knitting a sleeve from top to bottom or vice versa - depends on the knitting pattern of a single item. They offer one and the other version of knitting "Bat".
Often sweaters, tunics and pullovers with such sleeves. knit from the bottom backs and shelves. Starting with large parts of the product, a straight web is knitted before the armhole begins. Here you can add loops at once, or you can type the required number of loops at the beginning of one row and repeat it in the next row, and the necessary number of times.
When knitting sleeves, and hence the entire product as a whole, down up(in other words, from the elastic of the sleeves), it is knitted as a stitch, after which the loops are drawn for large parts. Loops are closed in the order of their set.
Video tutorial for beginners
To make it easier for novice knitters to understand the intricacies of knitting sleeves, it is worthwhile to look at a few detailed master classes on knitting these important elements. Video lessons from professional knitters are ideal for learning to knit them quickly and correctly.
Video lesson - knitting sleeves

